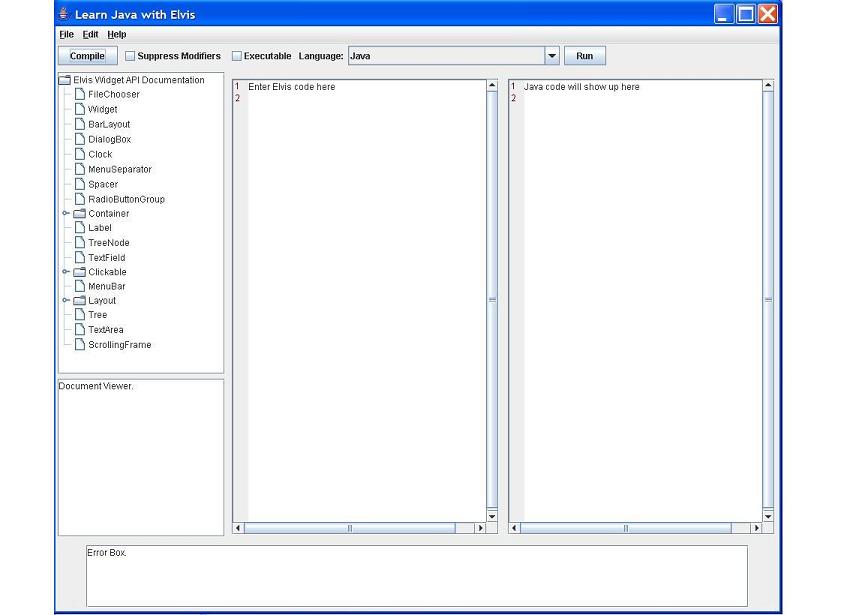
The screenshot above is a view of the Learning Tool. There is a button bar along the top and five main text areas.
The button bar includes:
The five main text areas are:
The following example walks through creating a button on a window.
In the ELVIS Text Pane, enter the following code:
mockup: true;
Window myWindow {
    title: "Window Title";
    Button myButton {
        label: "Button Text";
    }
}
Click the "Compile" button, save the file with a '.gui' extension, and watch what happens. Try checking the "Suppress Modifiers" and "Executable" checkboxes and observe their effect on the generated code.
The Learning Tool should now look like:
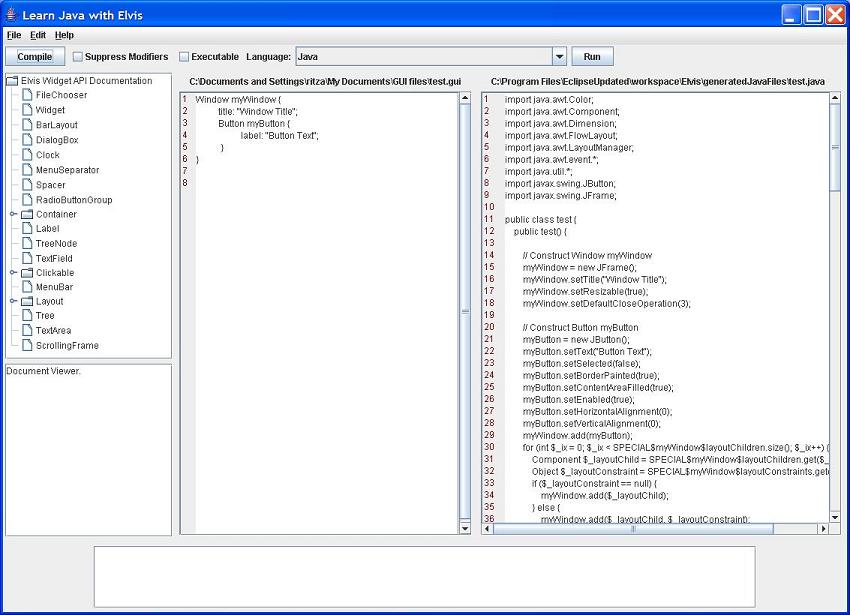
The Java Text Pane is now filled with the generated Java code. Take a look; you can now see how the Window called "myWindow" and the Button called "myButton" is written in Java. This file is saved in the directory at the top of the Text Pane; the user is free to take this code and change it outside of the Learning Tool.
By clicking the "Run" button, the user is actually compiling and running the code in the Java Text Pane. This will only generate a "Mock-Up," a Graphical User Interface that doesn't do anything. Notice that when you click "Run" for this example, nothing happens after clicking the button that appears. This is because the user hasn't written the back-end for the button. This is addressed in other parts of the web site.
Change the line
title: "Window Title";
to
WindowName: "Window Title";
and click "Compile." Now, the Learning Tool looks like:
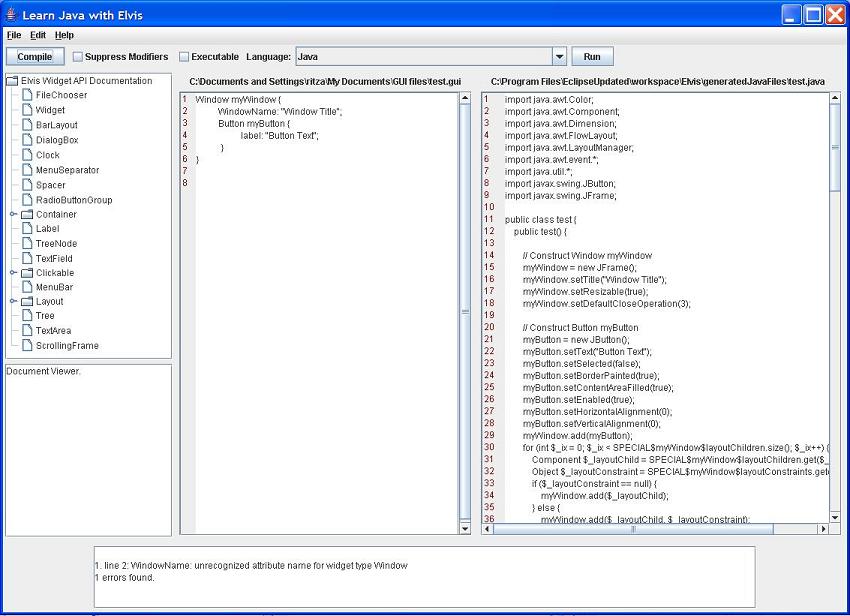
An error has appeared in the bottom text pane; it directs the user to Line 2, where the compiler encountered an unfamiliar attribute. Fix this and click the "Compile" button again; the error has disappeared.
Say that the user did not know that title is the correct attribute for the title of a Window. They can use the Widget API in the right-hand pane to help them. The tree contains all the widgets that can be used to generate Java files. By clicking on a node, information about that specific widget type is displayed in the documentation pane below. A Window widget is a Container, so by expanding the Container node, we can look up how to define the title for a Window: